What is Iron On Flocked Vinyl? How to Use it?
When we talk about vinyl, a glossy and shimmery paper comes to mind. And yes, that is what initially vinyl was all about. But today, in the printing world, flocked vinyl is something that has become quite popular among DIYers and hobbyists. Its thick, fuzzy texture allows you to add texture and depth to your printing projects which no other printing method allows.
Its unique texture is the reason behind its popularity. Furthermore, unlike all the other vinyl, you can layer flocked vinyl on top of solid vinyl, and you can layer it on top of flocked vinyl using sublimation ink. In short, it can be layered in both ways, on and above, which makes it highly versatile and flexible to use.
For those of you who are unaware of What is iron on flocked vinyl?, you have landed at the right spot. Today in this article we are going to be discussing what flocked HTV is, here it differs from solid HTV, what are its benefits and how you can print and cut it to transfer it onto your substrates. Continue reading to learn everything you need to know about flocked vinyl.
Table of Contents
What Is Flocked Heat Transfer Vinyl?
Flocked vinyl is the type of vinyl that comes with a fuzzy, leathery, and suede texture. It is thicker than normal vinyl and has better adhesive properties when it comes to fabrics. It adds depth, texture, and dimensions to the prints which no other printing method does.
Its unique texture is what makes it popular among the masses. For the hobbyist, flocked vinyl projects can be a great way to pass their time. Many have also turned it into their business as flocked iron-on projects can last up to 50 washes which means months and even years, depending on their usage and washing cycles.
Flocked Vs Smooth Heat Transfer

Smooth heat transfers vinyl and flocked heat transfer vinyl is much similar in terms of application. The only difference between the two is the texture and the cutting mechanism. Flocked vinyl is fuzzy and thick in terms of texture whereas smooth vinyl is thin and smooth.
Similarly, you can use a thin blade to cut through smooth vinyl whereas you will need a thick blade with deep penetration to cut through the fuzzy vinyl. Other than that, the process of printing and heat press are similar and require the same amount of time.
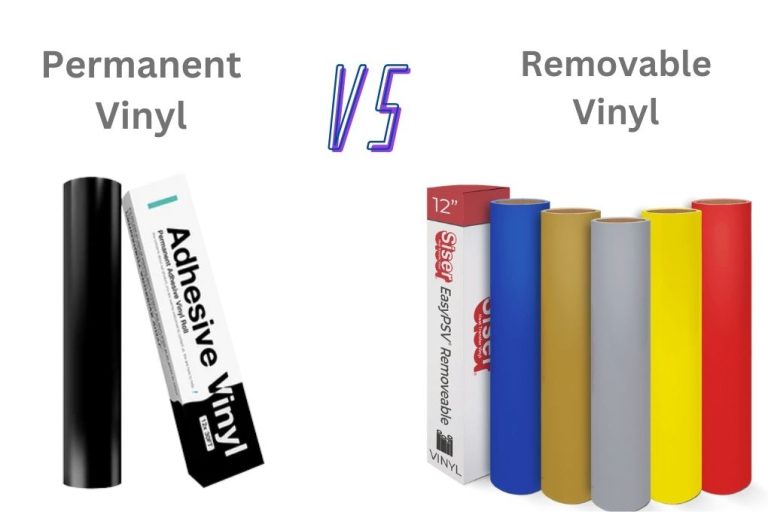
Related: Permanent vs Removable Vinyl
What is Flocked Iron On Used For?
Flocked heat transfer vinyl has a lot to offer to the hobbyist. Its unique texture and layering feature allow you to create projects like never before. Here is what flocked HTV has to offer;
- It adds dimensions to the print.
- You can layer sublimation inks on top of the flocked vinyl print.
- You can add flocked vinyl onto solid vinyl print.
- It comes in both hot and cold peel, giving you both a glossy and matte finish.
Substrates On Which Flocked Heat Transfer Vinyl Can Be Applied
Using a flocked iron-on is much similar to using a regular heat transfer vinyl. But to help you out, we have broken down the process into multiple steps. From cutting the vinyl to applying it using heat transfer, we have covered it all.
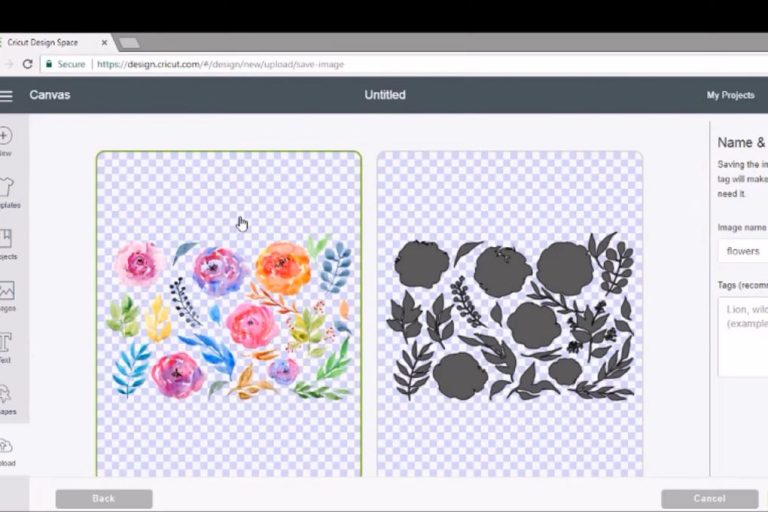
Cutting Flocked Vinyl
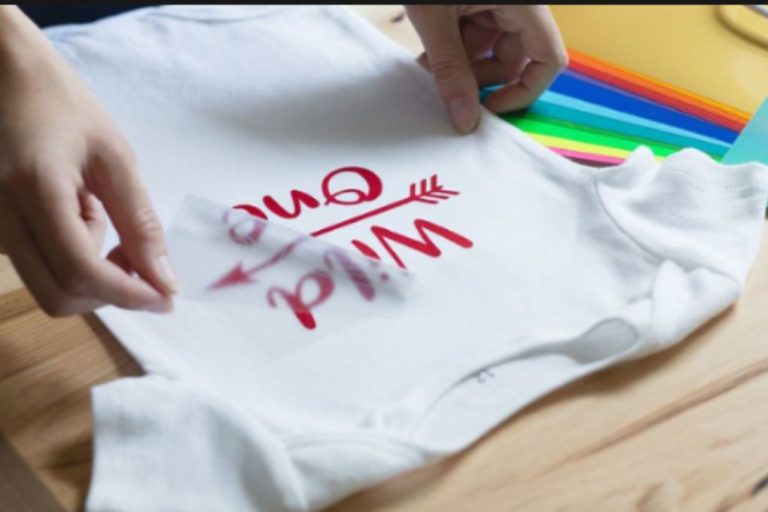
First things first. Let us begin with cutting the vinyl. For this process, you only need two things: your Cricut and your cutting mat. Once you have your vinyl print, place it upside down onto the mat. Remember the shinny side needs to be facing downwards.
Now attach your pointy blade to your cutting machine (Cricut) and make sure to adjust the settings for deep penetration. Since the flocked vinyl is thicker than solid vinyl, it requires more force and dept for cutting.
Position the mat and the vinyl on top into the cutting machine and let it run on iron-on settings. Once done, remove the mat and start weeding your decal. The weeding process for flocked vinyl is similar to solid vinyl so it should be a problem.
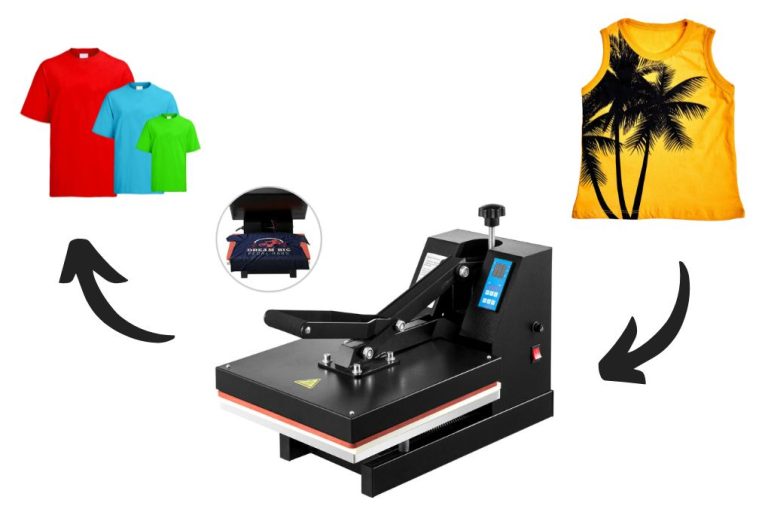
Applying Flocked Vinyl Using Heat Transfer
The next step is to apply the flocked vinyl onto the fabric using heat transfer. Once you have weeded the decal, it is now ready to be applied to any type of fabric including cotton. Here is a step-by-step approach using which you can apply it to your fabric successfully.
- Turn on your heat transfer machine and let it pre-heat at 320°F. 15-20 seconds is more than enough.
- Now take your fabric and iron it at medium heat to remove the wrinkles and the moisture caught between the threads.
- Now place the fabric onto the heat press.
- Once in place, it is time to position the decal on the fabric.
- Next, you need to press the heat press down. But we suggest that you place a towel onto the decal before pressing the heat press to ensure the decal is positioned in place.
- Let the heat press run for 10-15 seconds. Remove the lid to check if the vinyl has completely adhered.
- If not, let’s sit for a few seconds more and you should be good to go.
- Once down, peel it off if it is a hot peel, or wait for it to cool down if it is a cold peel.
- And you are done!
A trick here is that to ensure proper adhesiveness, read the guidelines of the vinyl brand that you are using. In most cases, vinyl comes with instructions that suggest the required temperature and time period for the heat press.
Furthermore, once your print is onto the fabric, do not wash it for 24-48 hours. The longer you let it sit, the better it will stick to the fabric.
Layering on Flocked Heat Transfer Vinyl Using Sublimation
That is not where your craft project should end because you can further customize your fabrics by adding sublimation to your flocked vinyl shirts, pillowcases, and more. The good thing is that you don’t need much for this, just your flocked fabric and printing supplies.
Here is how you can add sublimation ink to your flocked vinyl fabrics:
- Using your sublimation printer, print your desired design onto the sublimation paper.
- Once done, place the paper, with the print side facing downwards onto the vinyl.
- Using heat-resistant tape, secure the print in place.
- Now add butcher paper to your heat press mat and place it inside the shirt.
- Position the shirt onto the heat transfer.
- Add butcher paper to the sublimation and vinyl print as well.
- Let the heat press run depending on the instructions on the sublimation paper package.
- Make sure to set the temperature, pressure, and timing requirements accordingly.
- Once done, remove the heat press mat and the butcher paper.
- Reveal the design and you are all done!
Using this technique, you can create amazing designs and unique projects for your home and office décor. Flocked iron-on vinyl allows you to add texture and dimension to your prints which no other printing method has to offer.
Related: Types of T-Shirt Printing
Care Instructions
Although flocked vinyl is long-lasting, there are certain ways in which it can be harmed when exposed to extreme conditions. So, here are a few care instructions that will help you ensure the longevity of your flocked vinyl projects:
- Wash them after every 48 hours or more
- When washing, make sure to turn the fabric inside out
- Always use cold water for washing
- Use natural or mild detergents
- Always let the fabrics airdry
- Do not expose it to chlorine or bleach
In case you have used flocked vinyl on our substrates, keep them away from water and heat. Extreme weather conditions can affect the adhesiveness of the vinyl which in return leads to cracks and fading. So, keep your substrates in cold and dry places.
Tips for Working with Iron On Flocked Vinyl
Heat settings and application techniques
- Consult the manufacturer’s instructions for recommended heat settings and application temperatures specific to the flocked vinyl you are using.
- Generally, flocked vinyl requires a higher temperature compared to regular smooth vinyl. Set your iron or heat press accordingly to ensure proper adhesion.
- Use a Teflon sheet or parchment paper to protect the flocked surface from direct heat, preventing any damage or melting.
Washing and care instructions
- Allow the applied flocked vinyl to cure for at least 24 hours before washing to ensure maximum durability.
- Always refer to the specific washing instructions provided by the manufacturer of the flocked vinyl, as different brands may have slight variations.
- Typically, it is recommended to wash garments or items decorated with flocked vinyl inside out in cold water and on a gentle cycle.
- Avoid using harsh detergents, bleach, or fabric softeners, as they can potentially damage or fade the flocked design.
- Hang drying or using a low heat setting in the dryer is usually preferred to maintain the integrity of the flocked vinyl.
Troubleshooting common issues
- Cut flocked vinyl with the shiny side facing down on the cutting mat to ensure the design is properly mirrored.
- When applying flocked vinyl, ensure that the flocked surface is facing up and in direct contact with the fabric or surface.
- Use a firm and consistent pressure when ironing or applying heat to ensure proper bonding between the flocked vinyl and the material.
- If you’re working with multiple layers of flocked vinyl, apply each layer separately, ensuring the previous layer is fully adhered before adding the next one.
- If the flocked vinyl doesn’t adhere properly, increase the heat or pressure slightly and reapply heat for a longer duration.
- In case the flocked vinyl begins to peel or lift after washing, use a heat press or iron to reapply heat and pressure to re-adhere the vinyl to the fabric.
Comparison with Other Types of Iron On Vinyl
Flocked vs. smooth vinyl
- Texture: Flocked vinyl has a soft, velvety texture, while smooth vinyl has a smooth and glossy surface.
- Appearance: Flocked vinyl creates a tactile and textured effect, whereas smooth vinyl provides a sleek and shiny finish.
- Material Composition: Flocked vinyl has tiny fibers adhered to a backing, while smooth vinyl is made of a single, solid colored layer.
- Application: Flocked vinyl requires higher heat settings and more pressure during application compared to smooth vinyl.
- Suitable Fabrics: Flocked vinyl is ideal for cotton fabric and other materials that can withstand higher heat, while smooth vinyl works well on a variety of fabrics.
- Cutting: Flocked vinyl may require a fine-point blade on a vinyl cutter due to its textured surface, whereas a regular vinyl can be cut with a standard blade.
Flocked vs. glitter vinyl
- Texture: Flocked vinyl has a soft and fuzzy texture, while glitter vinyl has a smooth texture with added sparkle and shine.
- Appearance: Flocked vinyl provides a velvet-like finish, while glitter vinyl adds a reflective and glittery effect to designs.
- Material Composition: Flocked vinyl consists of fibers adhered to a backing, while glitter vinyl has a thin layer of glitter particles on top of a colored base.
- Application: Both flocked and glitter vinyl require higher heat settings and firm pressure during application.
- Suitable Fabrics: Flocked vinyl works best on cotton and similar fabrics, while glitter vinyl can be applied to a wider range of materials.
- Cutting: Flocked vinyl may require a fine-point blade, similar to glitter vinyl, to ensure clean and precise cuts.
Flocked vs. other specialty vinyl options
- Suede-like Material: Flocked vinyl creates a suede-like texture, adding a unique tactile element to designs, while other specialty vinyl options offer different effects such as holographic, metallic, or patterned finishes.
- Application Techniques: Flocked vinyl requires higher heat and pressure for application, similar to some specialty vinyl options, but each specialty vinyl may have its own specific application requirements.
- Suitable Projects: Flocked vinyl is often used for apparel decoration, home decor, and accessories like tote bags, while other specialty vinyl options can be used for a wide range of creative projects.
- Backing and Cutting: Flocked vinyl is typically applied using a carrier sheet and cut with a fine-point blade, while other specialty vinyl options may have different backing and cutting requirements.
- Pressure and Heat Settings: Flocked vinyl generally requires medium pressure and higher heat settings, but these requirements may vary for different specialty vinyl options.
Iron on Flocked Vinyl FAQs
Conclusion
By now you should know what is iron on flocked vinyl, what to use it for and what it has to offer to your craft projects. With its diverse range of layering options, you can create craft projects like never before. So, get your stock of flock vinyl, your Cricut, and your substrates – and start printing!

I’m Derrick Flora and I am the owner of Printangles.com. I am the father of 2 angles and 1 boy and I am 37 years old. I had done Bachelor in Fashion and Textile Studies from FIT State University of New York.
It’s been 7 years since when started the sublimation business. I sublimated mugs, t-shirts, canvas, and many more. And we have analyzed some things that beginners don’t apply the actual strategies to complete the project. And those strategies are making your sublimation better onto the material. What do beginners do, they just buy the sublimation printer and the heat press without knowing about them.