How to Make Sublimation Coating 2023
Sublimation has given an aesthetic and captivating look to the sublimation blanks. And sublimation has taken the business of crafters to the next level because the sublimating crafts are selling all over the world. You might be thinking that which products can be sublimated or can sublimate every material? The answer is you can’t sublimate every material because the sublimation printer accepts at least 65% polyester material.
If the polyester percentage is 100%, then there is nothing better than this. But you can sublimate the non-polyester or non-coated material as well. For that, you’ll need to do one step more than the polyester material sublimation process. Let us tell you how to make a sublimation coating before we dive into the detailed process.
The process starts with a coating of that specific material and preparing for sublimation. Then create the design, printing that design via a sublimation printer, and the final step includes pressing the craft through a heat press. For sublimating your non-coated material, you just need to make sure that you are following all the steps. As the steps have been implemented by us in the process with all the safety guidelines as well.
Table of Contents
How to Make Sublimation Coating at Home
Without the sublimation accessories, you can’t start the process. And we are gonna sublimate two dissimilar materials to make it easy if anyone of you is having the craft out of these two materials. Stick to the guide and not only sublimate the products but brighter with vibrant colors and attractive colors.
Things needed for the sublimation process
You’ll need some compulsory materials that you always required whatever the material you choose for sublimation. Let me mention those accessories first before mentioning the two crafts necessary accessories.
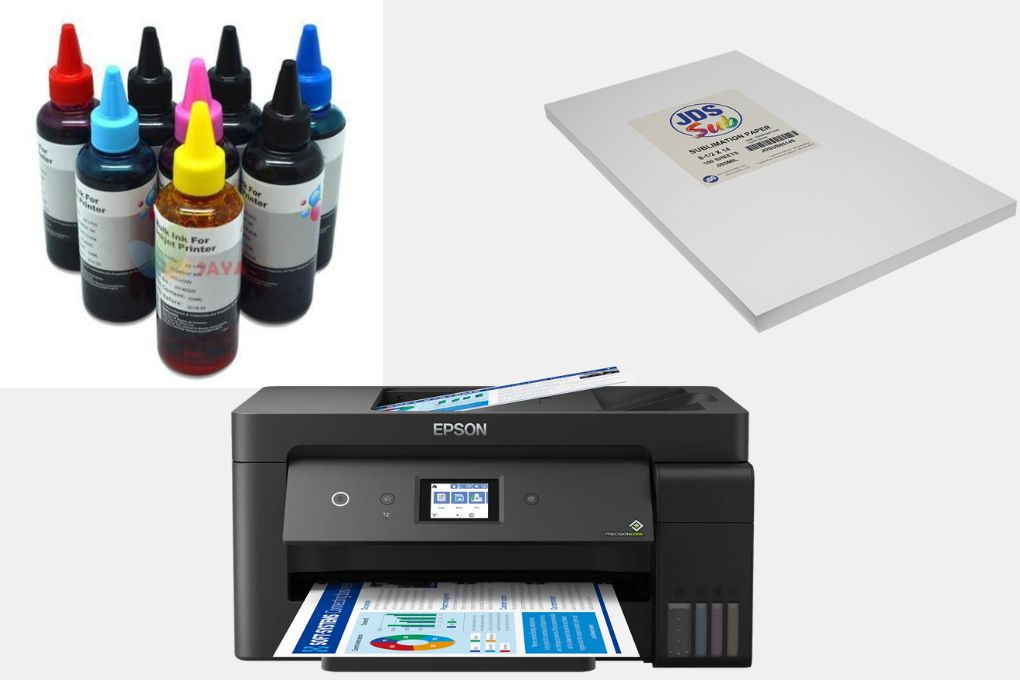
- Sublimation Printer
- Sublimation ink and paper
Now we’re mentioning different accessories for distinct materials.
For Stainless steel (Bottles)
- Poly-glass and depress catalyst
- Paintbrush
- Measuring cup
- Syringe
- Mug press or Oven
For Cotton (T-shirt)
- Fabric sublimation coating spray
- Heat press
- Spray bottle
How to make sublimation coating for stainless steel
Read More: Sublimation Types 2023, sublimation over sublimation, sublimation papers and their use
Step #1 – Using and mixing poly-glass with catalyst

In the first step, make sure you have purchased all the materials that are mentioned above. If not, then buy those accessories and start the process in this way. After purchasing, you’ll pour the poly-glass into the measuring cup according to the material’ area required for sublimation. And then pour the catalyst into that cup by using the syringe up to 1ML. After pouring the poly-glass and catalyst, now you’ll mix it with whatever equipment you use for that.
Read More: How to sublimate on an uncoated wood, Top Quality Papers for Sublimation, Brighter sublimation
Step #2 – Sublimation coating for stainless steel bottles
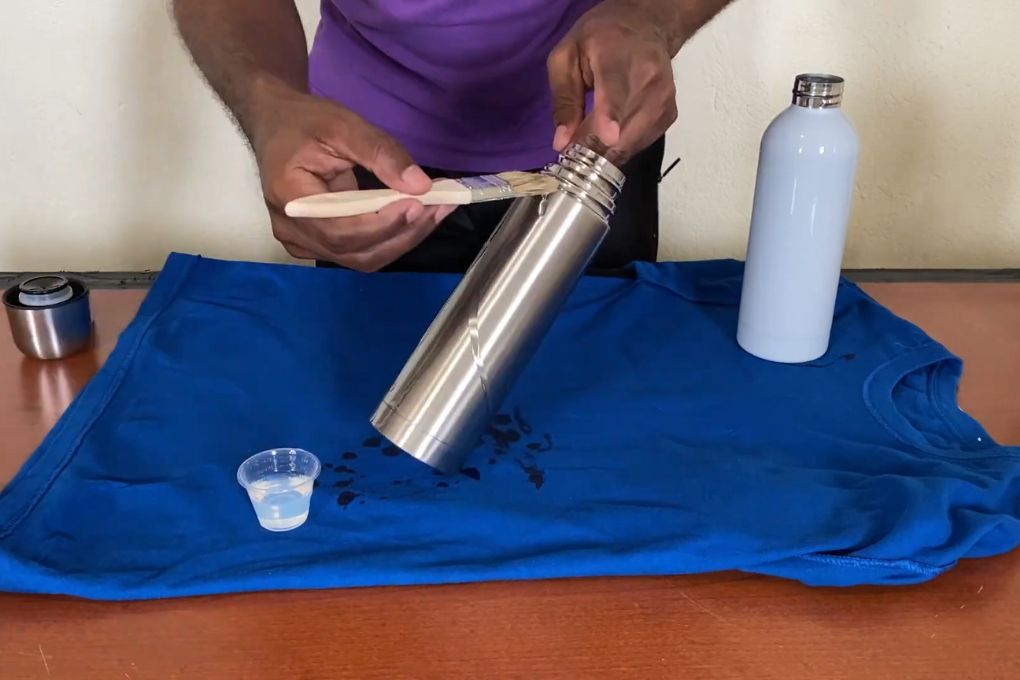
Before coating the surfaces, you need to make sure that the surface is purely clean and smooth. And perfectly ready for the coating process. If you are doing the coating process at a precious place, then place the piece of cotton to protect that area. Once everything is ready, now use the paintbrush to coat all the surfaces of stainless steel completely.
And if you have another stainless steel item, coat that item in the same way as well. Add on, you can use the bottle containers to cover the coated stainless steel to protect from wrinkles or bubbles. Now leave the bottles for some time for complete drying.
Step #3 – Sublimation design
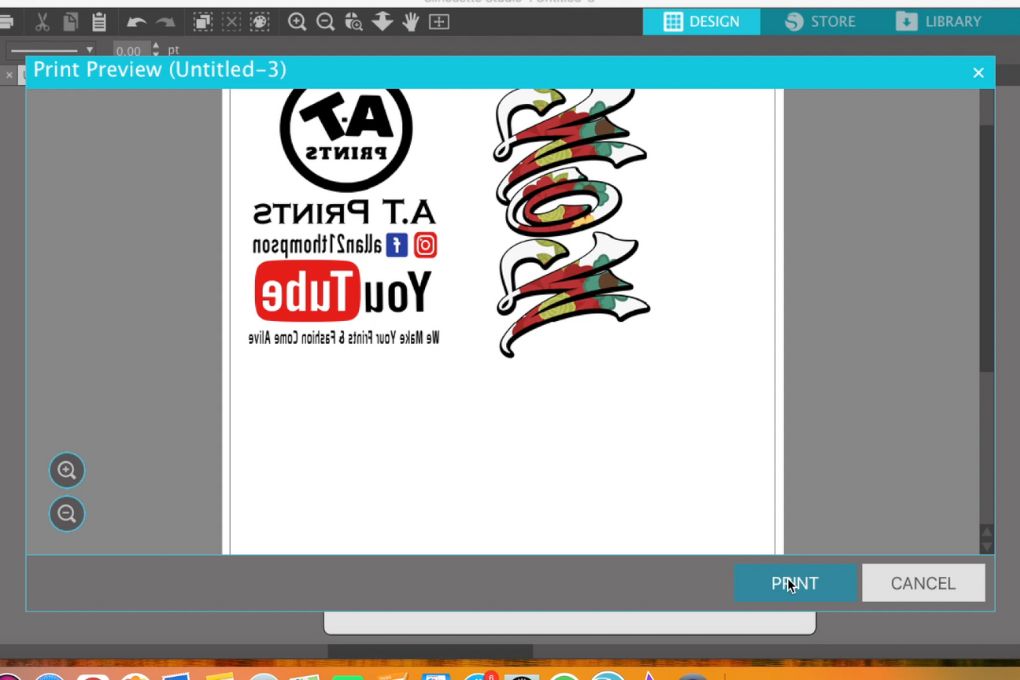
Once the coating is done, the sublimation process starts. And for that, you need to have the sublimation design first of all. If you are worried about choosing the right design software, all the things are successfully described in the sublimation design software article.
You’ll be able to choose your required software. And the beauty of that software is you don’t need to be an expert in designing. You’ll select the dimensions according to your material so the design can easily be sublimated onto the craft.
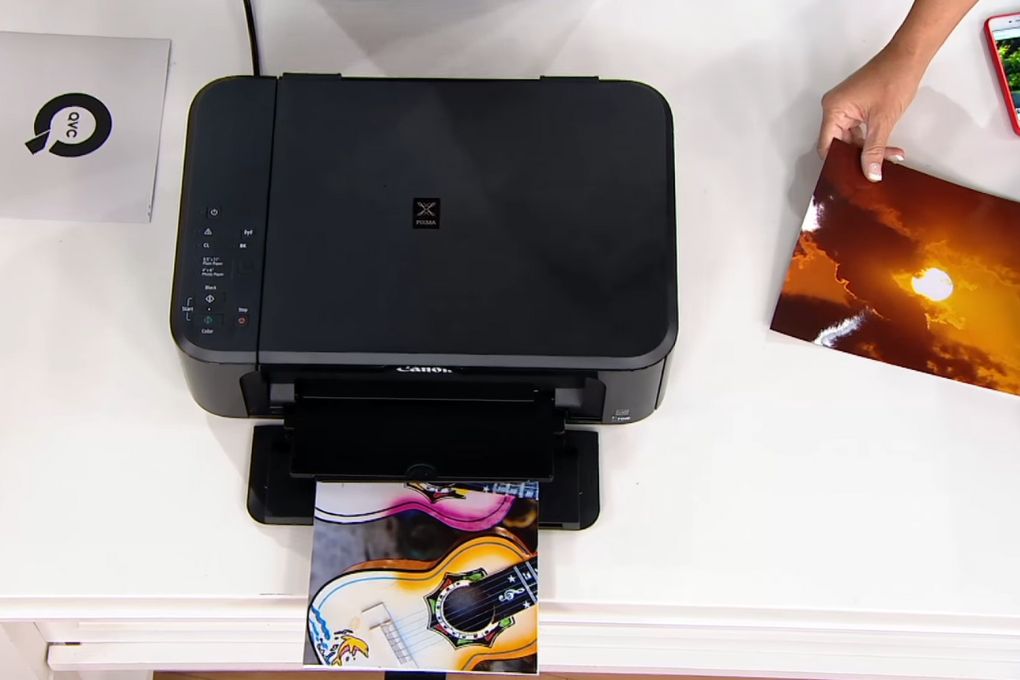
Step #4 – Printing the design using a sublimation printer
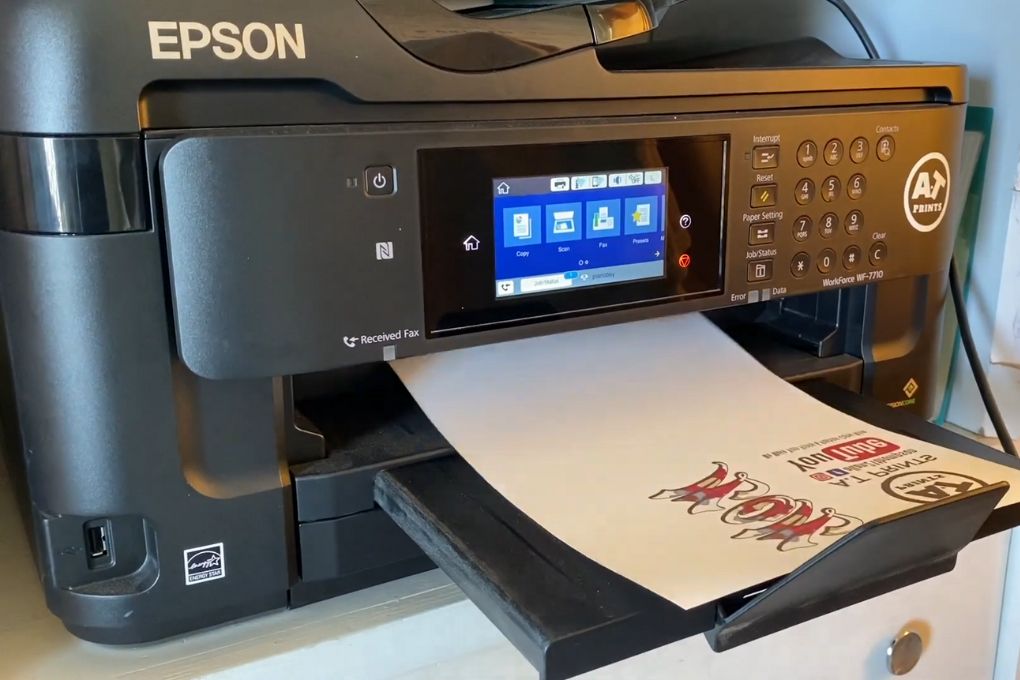
After creating the design, it’s time to print that design via a sublimation printer. It uses sublimation ink that appears in the form of colors or text on the paper. And also it uses paper where all the colors and designs are printed and then this paper retains and transfers the design onto the material. So make sure that you’ve chosen all the sublimation equipment for brilliant results.
Read More: Best Sublimating Printers for Mugs, DTG vs sublimation printing, Making sublimation tumblers
Step #5 – Preparing stainless steel for the final step
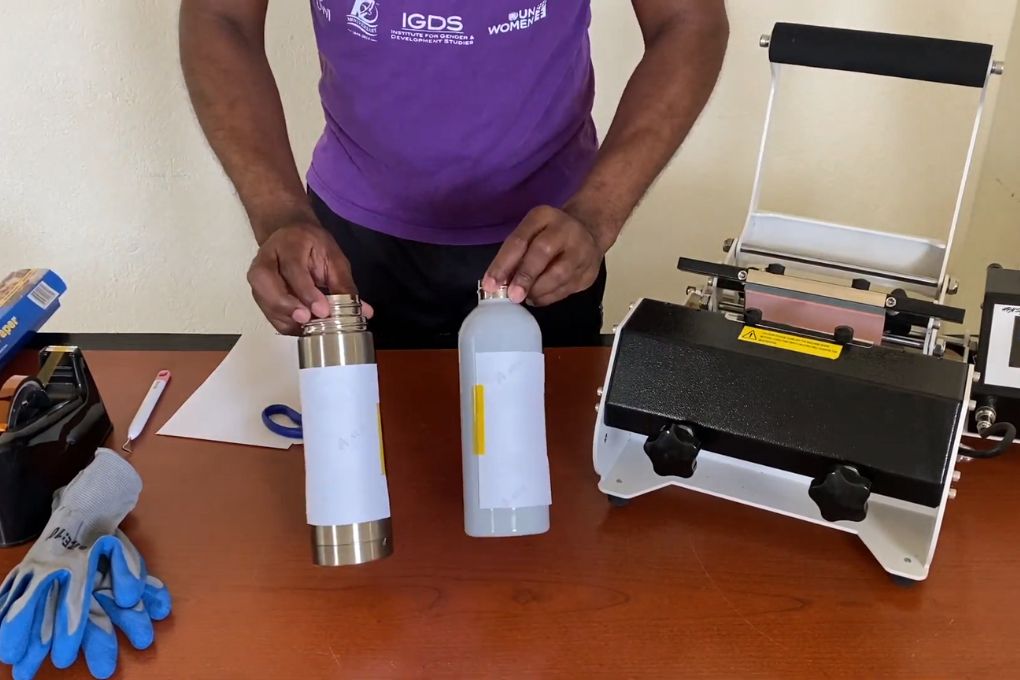
Now bring the printed paper and fix it with the stainless steel by using Heat resistant tape. Because the tape helps you in avoiding the ghosting design. And for the mug press safety and good health, use parchment paper and roll the bottles completely with it.
Step #6 – Turning on the mug press and pressing the material
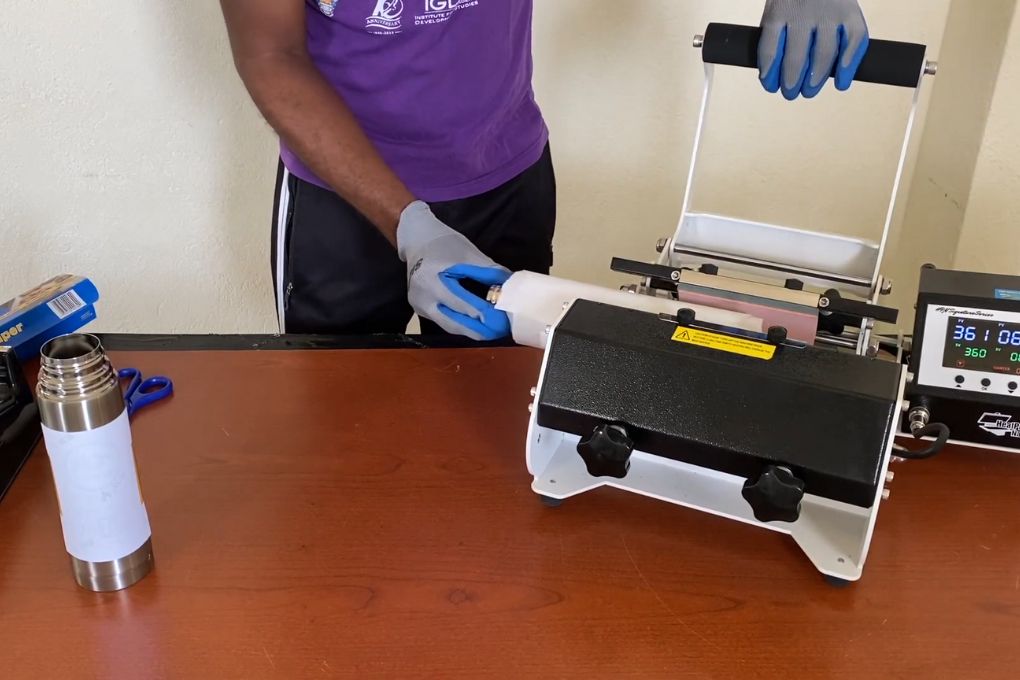
Now turn on your mug press or oven at the temperature of 360 F and set the time up to 60 seconds. And place your material into the mug press and press it for 60 seconds. When the time gets up, lift up the mug press and lift the material. Now do the same with the other bottle and leave it for some time to let them cool off. When it’s cool down and touchable, remove the parchment paper, resistant tape, and printed paper.
Note: The sublimation result will be a little bit blurry, You just need to use the tissue paper to clean it once. Now check the design, it’s clean and smooth with vibrant colors.
Sublimation coating for the tumblers and the mugs demands the same coating process. Just you need to have the ceramic sublimation coating liquid to prepare the tumblers and mugs. But you need to ask the manufacturer of tumblers and mugs to give the coating instructions guidelines. Otherwise, you can coat the way we have coated and sublimated.
Read More: Best Sublimation Printers for T Shirt Printing, Sublimation on Cotton, Permanent vs Removeable Vinyl
How to make sublimation coating for Cotton
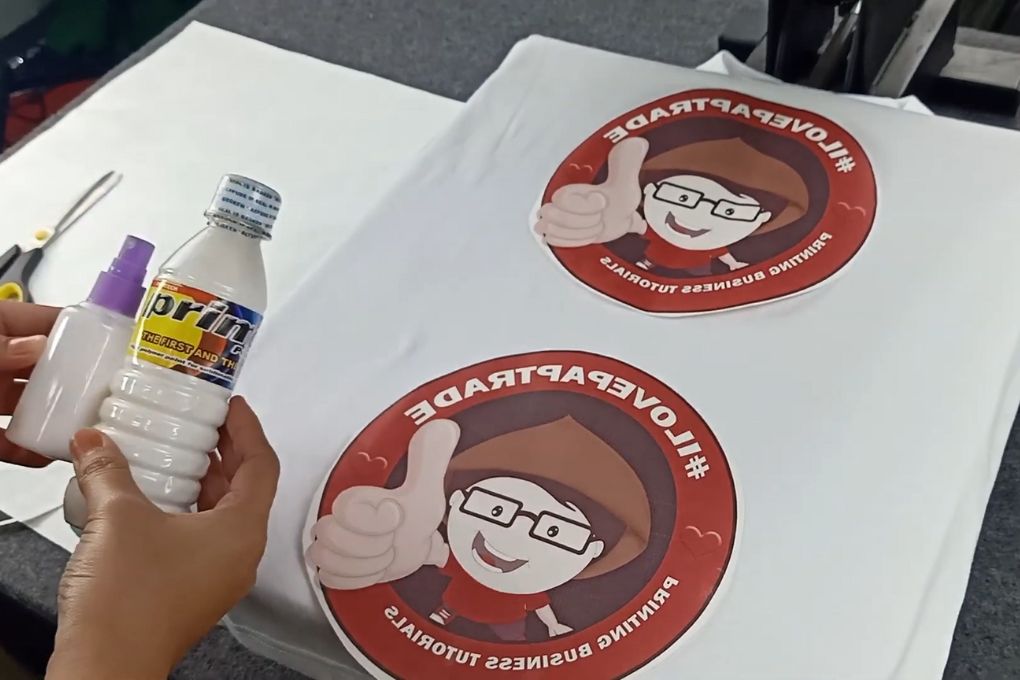
Step #1 – Using Fabric sublimation coating spray
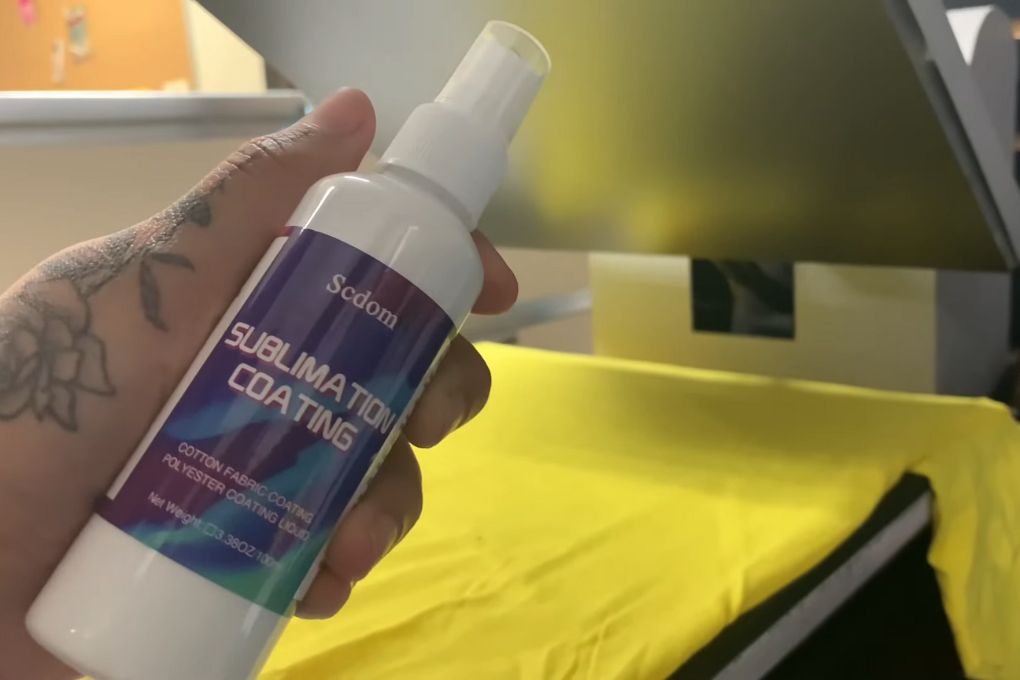
The first step is asking you to purchase the fabric sublimation coating spray. Before spraying the fabric, it’s good to use the piece of paper to place inside of the T-shirt to protect it from transferring the spray to the second side of the shirt. If you have already, now spray onto the desired place by using the spray bottle. And choose the right and clean place for the coating process too.
After spraying, let the t-shirt dry completely for better results. Before going through the process, you must have the design created on the designing software. I haven’t created it yet, go and create the design first as it’s a time taking and worthy step, especially for beginners.
Read More: 7 Best Starter Sublimation Printers
Step #2 – Using a sublimation printer
You can’t proceed further without using the sublimation printer. As it prints the design that you create via designing software. Make sure you are having the classic print with better colors.
Step #3 – Turning on the Heat press and pressing the material
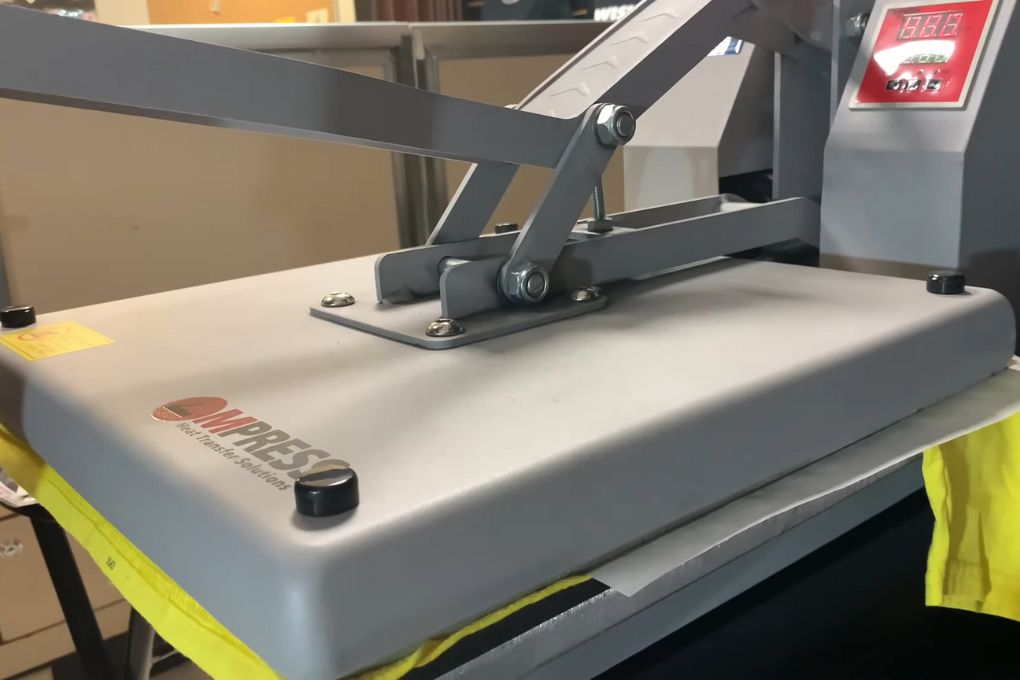
Now turn on the heat press at 390 F and set your heat press timing for 30 seconds. Use the resistant tape to fix the paper onto the shirt and now again place the paper inside the shirt to protect the second side for transferring the design. After preparing the material fully, place the t-shirt into the heat press and then press it for 30 seconds for a complete transfer.
Related: Best Sublimation Printers for Heat Transfer
Tips for Effective Sublimation Coating
Creating the perfect sublimation coating is a critical component of the dye sublimation process. Here are some effective tips to help ensure your coating process results in a high-quality, vibrant sublimated image.
Achieving an Even Coating
A critical factor in dye sublimation is ensuring an even coating. Whether you’re applying your sublimation coating to a ceramic mug, a polyester fabric, or cotton fabric, your primary goal should be consistency. Uneven application can lead to a patchy and inconsistent sublimated image.
When using a sublimation spray, ensure that the item is sprayed evenly, and try not to leave any dry spots. Consistency in your motions can help in this. Move steadily and slowly, covering all areas of your intended sublimation surface.
For flat items such as transfer paper or heat transfer vinyl, using a roller can help achieve a more uniform coating. With items like ceramic mugs or rounded polyester products, you’ll have to use a bit more precision to ensure all curves and edges are adequately coated.
Proper Storage of the Coating
Once you’ve prepared your sublimation coating, storing it properly is crucial to its efficacy. Ideally, you should keep your sublimation spray in a cool, dry place, away from direct sunlight. This helps to maintain the integrity of the polyester coating, ensuring it performs well in the dye sublimation process.
For those planning to use the coating after some time, storing in an airtight container can preserve the coating’s quality. Remember, exposure to air or moisture could impact the quality and longevity of your coating.
Troubleshooting Common Issues
Understanding common issues that arise in sublimation coating can help you avoid or correct them.
A common problem is insufficient coating. This is usually seen when the sublimated image appears faded or washed out. To rectify this, you may need to apply an additional layer of coating and repeat the heat transfer process.
Sublimation requires the use of heat, but too much heat can cause problems like image distortion or discoloration. It’s crucial to maintain the correct temperature for the particular material you’re working with—be it cotton fabrics, polyester fabrics, or ceramic products.
Another common issue is the ink not adhering to cotton fabric. Remember that sublimation is typically more effective on polyester materials. For cotton, a different type of coating might be necessary, or you may need to consider a blend of cotton and polyester for the best results.
Mastering the art of sublimation coating takes time, patience, and practice. It is a vital step in the dye sublimation process and can make all the difference in creating high-quality, vibrant, and long-lasting sublimation products.
Conclusion
Two different materials have been used for the sublimation coating process. And the process of coating and then sublimating both materials are described in detail. You can coat and sublimate your material by following the steps that we’ve used for those processes. And don’t forget to follow the safety guidelines to protect yourself and your sublimation accessories. Well, many beginners ask what is sublimation coating made? it’s the polymer comprising polyurethane, polyesters, acrylics, and epoxies.
Read More: Selection of sublimation printer for business needs

I’m Derrick Flora and I am the owner of Printangles.com. I am the father of 2 angles and 1 boy and I am 37 years old. I had done Bachelor in Fashion and Textile Studies from FIT State University of New York.
It’s been 7 years since when started the sublimation business. I sublimated mugs, t-shirts, canvas, and many more. And we have analyzed some things that beginners don’t apply the actual strategies to complete the project. And those strategies are making your sublimation better onto the material. What do beginners do, they just buy the sublimation printer and the heat press without knowing about them.